Up and Running with Django, the crazy way! -- Part 1
The magics in Django part 1

Currently, I get geeks to work on and my clients get amused by my performance as a developer and that's what matters to the client, getting things done, no matter how.
So usually, we talk about a project let's say at 8:am, I give them a dashboard to test the project at 10:00 a.m., and then the front end at 4:30 p.m. I know, I did not add the dates because all this happens in one day! Amazing right!!
To me as a developer, that's what a sensible framework should help me do. Not spending weeks configuring security, months handling the admin dashboard, then another month handling the user-facing side -- front-end. Whereas frameworks have tried to achieve this, there is one that has stayed exceptional. I have time and again complained on the Django core devs mail group to add in features like we see the hotwire in the templates, inbuilt support for web sockets, and that other feature you're thinking about but I have realised that these ninjas are reducing the time spent building the backend/business logic so that we focus on handling these on our own.
In this article, we shall see how we can write CRUD in Django for a blog. Now this is the catch, we shall paginate the article with little or no code. Now if you're reading this from other frameworks, you have what to advise the core devs of your framework to focus on during their next release.
But before I start, let me first acknowledge and send my shout-outs to the following frameworks for their efforts to cope up and expose some of these features to other languages so that we devs can have more smart choices. Ruby on Rails in Ruby, laravel in PHP and Phoenix in Elixir.
Too much noise, right? Let's roll now.
We set up the Django project, usually, I love working in a virtual environment. Am not going to explain a virtual environment but Martin Breuss wrote something great about this here. So let's create one here.
python3 -m venv ourEnv
Note that ourEnv can be any name of your choice.
Let's start it now.
source ourEnv/bin/activate
To jump ahead a bit, if we want to stop this environment, we run this.
deactivate
Whichever environment you're working in, it will be deactivated immediately. Please keep our environment working(don't run the second command -- deactivate).
Now someone somewhere has run the above two commands and they failed! As a developer, what are you doing in a Windows OS?? For us on UNIX and Linux shall proceed joyfully :).
Now let's initialize a Django project. Well, don't forget that Django organises your entire codebase in something called a Django project. This project can consist of multiple apps, each app should work like an independent module such that you can even transfer it to other Django projects and it runs smoothly. In other frameworks, Django apps are equivalent to modules.
Let's initialize a new project now called `Blog`. We run this command below.
django-admin startproject Blog
Running the above command should fail unless otherwise. The reason is, that this command checks if we have already installed Django in our environment and if we haven't, the error you got will be raised. Now you know the use of a virtual environment - to isolate all dependencies we need to run our project including even the python version.
So now let's install Django in our environment with this.
python -m pip install Django
This installs the latest stable Django version. For more about this, please read here. In our case, it should be version 4.2.
Then running our previous command again should now work as expected.
If you run ls in the current directory, you should see a folder called Blog. When you cd into this folder and ls again, you see two things, a folder with the same name Blog and a file called manage.py.
With the manage.py we no longer need the command django-admin which is somehow shallow. This is the Django way to run any commands. It is also the main file and the entry file to the project with a very small codebase!
Now, let's open this with our favourite IDE or Editor. It should look like this. Am using PyCharm.
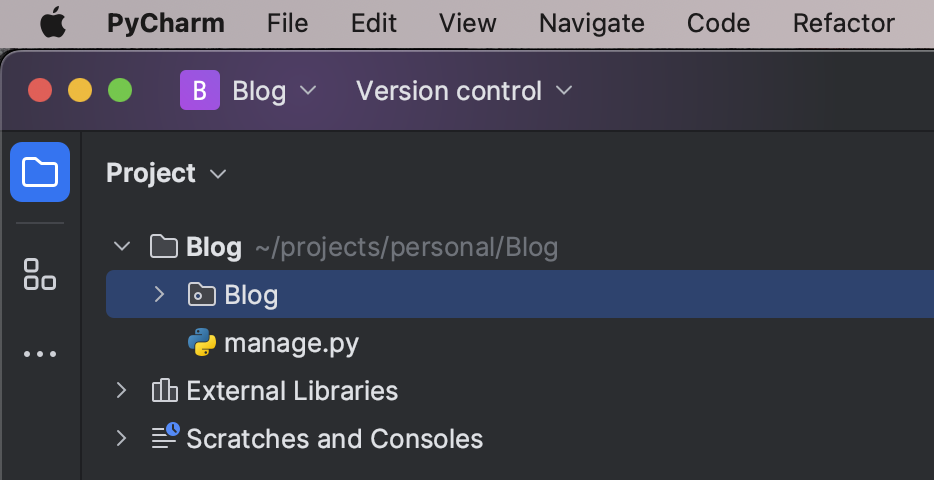
If you look into Blog > Blog folder, we have around five files.
__init__.py indicates that this folder is a Python package -- that's just normal Python at play.
asgi.py is what we use/point to when running asynchronous functionalities, don't be happy about this, it comes with other performance costs and that's why it is not a choice by default.
wsgi.py on the other hand is what we shall use to serve our project. It is the recommended choice and the default one.
settings.py is where we put all our app configurations, I mean all of them, from which model to use as the User model, to how we validate passwords, to our custom middlewares and many more.
urls.py is where we register all routes to our apps. This is the top level of the routes/URLs.
Please, let this folder stay as is. Let's create our app and work from there. This is not just a convention, but apps help you group together related logic and generally organise your work. This is the first clean convention I expect from a framework - organization.
Now we create our project and call it post. We run the command below.
python manage.py startapp post
Now our home directory has changed with one additional folder. It looks like this.
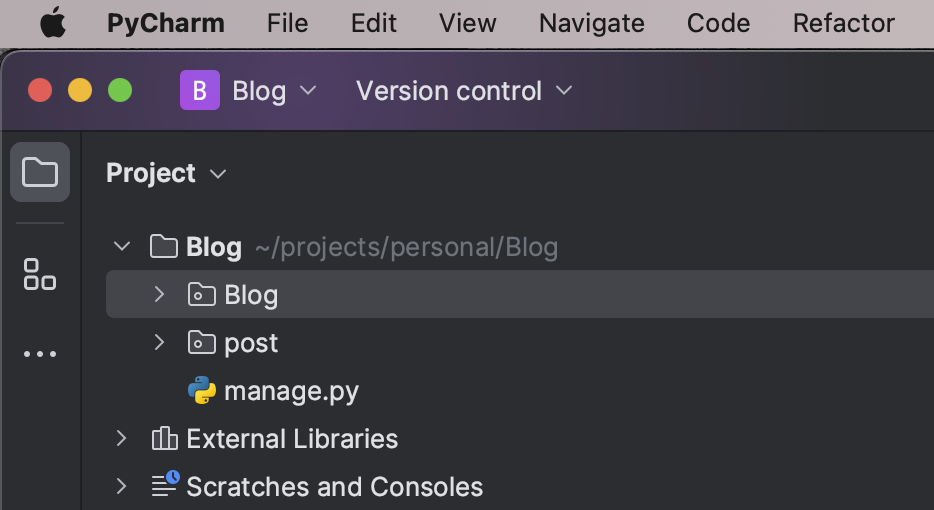
Let's expand this folder. On the top is the __init__.py which I had explained earlier, it has other files and folders. Let's briefly look at each of those.
migrations In Django, unlike other frameworks, we truck our database migrations and each app keeps its migrations here. But what are migrations? In other frameworks, crazy enough, you create these, but in Django, when you create a model(to be explained later), you run a command(we shall see this later) that transforms your model into an intermediary format with all the changes you have made on a model that needs to be depicted in your actual database by eventually migrating them. When you're collaborating as a team, you don't need to share the database ddls, or dumps, but these migrations, which they can migrate to get the current snapshot of the version of the database you're running on with all changes to apply.
admin.py is where we generate our admin dashboard from. This is where the actual magic happens that has been amusing my clients :).
apps.py is how we register this new app in the entire Django context, note this name='post':-
class PostConfig(AppConfig):
    default_auto_field = 'django.db.models.BigAutoField'
    name = 'post'
Whenever we want to refer to this app, this is the name we shall call it!! So now you just baptized something :).
models.py is where we keep our models and model-level logic in Django.
tests.py is for adding our unit tests.
views.py hosts our business logic. This is what you call controllers in other frameworks.
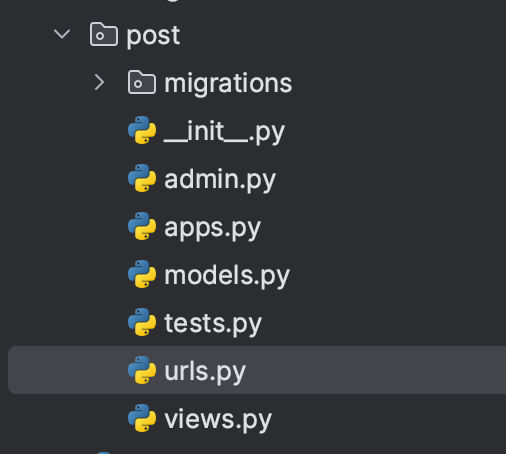
Let's add another file here called urls.py that will hold URLs that are specific to this app only. We can keep all our URLs in Blog > urls.py but again, we need to keep related logic together not mixed up. Now our post folder shall be looking like this.
Magic 101.
Let's get to our terminal and migrate all pending migrations with this command. I heard the question, "Where did we add our database connection?" Nowhere!!! By default, in development, Django comes with support for sqlite3.
Let's just run the command and see what happens.
python manage.py migrate
Now you should see a new file called db.sqlite3 in the root directory. Amazing, right?
But how does this come to happen, let's open Blog > Blog > settings.py, we shall find all the default apps that Django already ships with under INSTALLED_APPS:-
INSTALLED_APPS = [
    'django.contrib.admin',
    'django.contrib.auth',
    'django.contrib.contenttypes',
    'django.contrib.sessions',
    'django.contrib.messages',
    'django.contrib.staticfiles',
]
Therefore, Django checked through all those apps for any pending migrations that were ready to be migrated to the actual database. So, as you guessed it right, whenever you create your new app, you need to add its name here. Please don't add ours as yet. Then continuing in the same file, settings.py, ignoring the other configurations till this:-
DATABASES = {
    'default': {
        'ENGINE': 'django.db.backends.sqlite3',
        'NAME': BASE_DIR / 'db.sqlite3',
    }
}
Django is telling us that by default, it will go to your root folder, in our case Blog and then create a file called db.sqlite3 if it does not exist yet, using sqlite3 as the database engine which you, by the way, installed when you installed Django.
You can use any database client to inspect this database we just created.
NOTE: Don't go production with this database, Django, has full and extended support for Postgres. We shall look at this in the next series of this article.
Let's first continue and die of magic.
Now on your terminal, run this:-
python manage.py createsuperuser
Please go ahead and answer with the correct data as required, if you know English!
Did you just register a user? with superuser privileges??
There is one way to find out, let's run this:-
python manage.py runserver
Now open 127.0.0.1:8000/admin/ in your favourite browser.
Do you remember the credentials you created above? Enter them here and boom!

You have a dashboard, where you can perform CRUD on groups(called roles in other frameworks), perform CRUD on users, assign permission to a group, then assign a group to a customer, and handle sessions, with a site that respects the display mode of your entires system that is, if you're in dark mode like me, it will be dark, if in light mode, then it shall be light!!
We did not even install or configure nginx/apache, neither did we add Postgres, not even the notorous MySQL!! We are just up and running!!
Don't forget this, we have so far written 0 code but a project is running, with both the admin and front-end side!
You can even give this to your client and tell them how serious you are!!!
Now let's start coding to perform our CRUD on our project.
First, let's create our Article model in post > models.py. Just paste this we continue scaring the world.
# Create your models here.
class Article(models.Model):
    body = models.TextField()
    title = models.CharField(unique=True, max_length=300)
    posted_by = models.ForeignKey(User, on_delete=models.CASCADE)
    likes = models.ManyToManyField(User, blank=True, related_name="post_likes")
    posted_on = models.DateTimeField(auto_now_add=True)
    slug = models.SlugField(unique=True, max_length=400, blank=True, null=True)

    def save(self, *args, **kwargs):
        """
        If we don't have a slug, we add it from here. This means slugs will be added automatically
        """
        if not self.slug:
            self.slug = slugify(self.title + "-" + str(time.time()))
        super(Article, self).save(*args, **kwargs)

    def __str__(self):
        return self.title

    @property
    def total_likes(self):
        """
        This is a transient field, its not in the db, but now we can access it from the model instance just like other
        class properties.
        """
        return self.likes.count()
Now after this, try running this command which I expect not to add any effect, but run it and I tell you why it did not work.
python manage.py makemigrations
It should return something like, No changes detected. But why so? As I had said earlier, for every app you create, you need to get its app name from its app.py and add it to INSTALLED_APPS in Blog > Blog > settings.py like this:-
INSTALLED_APPS = [
    'django.contrib.admin',
    'django.contrib.auth',
    'django.contrib.contenttypes',
    'django.contrib.sessions',
    'django.contrib.messages',
    'django.contrib.staticfiles',
    "post", # note this here
]
Now run the command again, it works!
Now check under the migrations folder of the post folder/app, you should see our initial migration like this:-
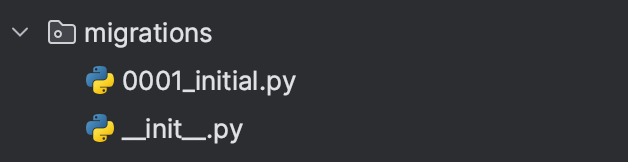
Now this is how Django saves our a**&* through creating for us the tricky part and leaving for us the simple part!
We are not done yet, our model is not yet in the database, now we can persist using the command below:-
python manage.py migrate
A green OK should appear somewhere in your terminal. But if we go to our admin side, we shall not find our Article-related content yet. Our admin.py is to our rescue, let's add this to our admin.py. Copying and pasting this to your admin.py adds full CRUD to your Django admin site:-
@admin.register(Article)
class ArticleAdmin(admin.ModelAdmin):
    list_display = ['title', 'posted_by', 'posted_on']
    list_filter = ['posted_on']
    readonly_fields = ['slug']
    search_fields = ['title','body','slug','posted_by__username', "posted_by__first_name",
                     "posted_by__last_name", "posted_by__email"]
    ordering = ['-posted_on']
Now, let me explain a bit what you just did and you understand why I call this magic!
To expose the whole article model to our admin site, we do this on this @admin.register(Article) only. The rest of the lines are facilitating the magic of searching, filtering, displaying and preventing reading on certain fields. These are not the only options but the commonly used ones.
Like the ordering, it's not just ordering but doing so in descending order because of the "-".
The search_fields, it's not just searching the model, but also, searching relationships. That's why you can search for an article by the username of the poster.
Start playing with this, and you will realise it is fully complete to perform everything you need. This is mine after adding two articles. Note the flash messages, and the filtering on the right, try searching the articles, everything is working pretty fine!!

We still have a few issues here, Django administration is still our title everywhere, let's change that to My Blog. We still haven't touched the HTML yet. Add this in your app.py of any of your registered apps in our case -- post.
admin.site.site_title = "My Blog"
admin.site.site_header = "My Blog"
admin.site.index_title = "Blog Home"
After adding the above, the whole platform should no longer show the Django defaults but your own now.

Just like that, you can build all your models and register them, then start scaring your clients to pay you :) since their dashboard is complete!!!!!
Look out for Part 2 which will now embrace class-based views to create our business logic, use the urls.py we created, then add some small HTML -- more magic here.

Thanks for reading, drop any questions and any topic confusing you in Django below, and I will write about it next explaining with details and simple English.